
Page 30 - B2B 8 to 13
P. 30
Roads, Rivers & Buildings
These are worth mocking in sooner rather than later so you have room for them, especially buildings, and to ensure that the scenery is flat where any water surfaces, roads or buildings need to be.
I often prefer to build mini dioramas for buildings on my workbench and then sit them into the scenery. That really helps with hard to reach areas and especially buildings which require detailed work. My workbench also has far more space to work on and is more comfortable.
At this point on the layout, we only need the bases and locations and we can add the actual roads, rivers and buildings in later.
Once you have a basic substructure the fun begins.
Ground
The first thing I always do is paint the substructure brown with acrylic or emulsion paint. I like basic raw umber as a colour in my New England layout. If you have any gaps in your scenery then this prevents a bright white substructure
peeking through. It also seals the base slightly which can help prevent warping if you have any thin wood sections.
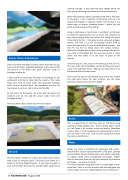
When the painting is done, I generally start with a thin layer of tile grout. I am a huge fan of tile grout and use it in almost every layout or diorama I build. You can buy it in a wide range of colours including brown. I prefer the dry grout and either wall or floor will do.
Using a small sieve or tea strainer, I sprinkle on a thin layer to cover the substructure. You can add a few variations to stop there being a plain flat surface but ideally the grout should be fairly thin. I then glue in place using two dropper bottles, one with a 1:2 mix of isopropyl alcohol (IPA) to water and one with a 1:2 mix of white glue and water. Use the IPA mix first to break down the surface tension. Without it, the glue will just ball on the surface of the grout. You need to thoroughly wet the area and ensure it soaks down and that there is no dry layer of grout at the bottom.
Once the grout is wet, drip on the white glue mix to fix it. This also adds a bit of flexibility so that the tile grout won't crack if the substrate flexes. Mop up any drips that run to the bottom with a kitchen towel.
That's my first step for the ground cover and if you choose the right grout colour for your location, you can leave patches to show as bare earth if needed.
Rocks
This is a good time to add any rocks or cliff faces using castings or ready bought rocks. That's a whole topic in itself so I will leave it for another article but briefly, Woodland Scenics' talus or rock mouldings are a great place to start if you are new to this area. You can then add grout around the rocks to bed them in.
Water
Water can cover a multitude of techniques and results. Simple water can be represented with a flat base, painted and varnished. More complex water, with waves, waterfalls or ripples, needs more complicated techniques. Rather than try and cover them all I will just talk about my favourite technique – using resin for water.
The most important thing with resin is a water tight river or pond bed. Resin is as thin as water and will leak given any chance. Make sure your underlying base has no holes at all.
16 ROUNDHOUSE - August 2018
